-
Call Now +86 13426858645
-
Any Questions info@sollydsiliconeink.com
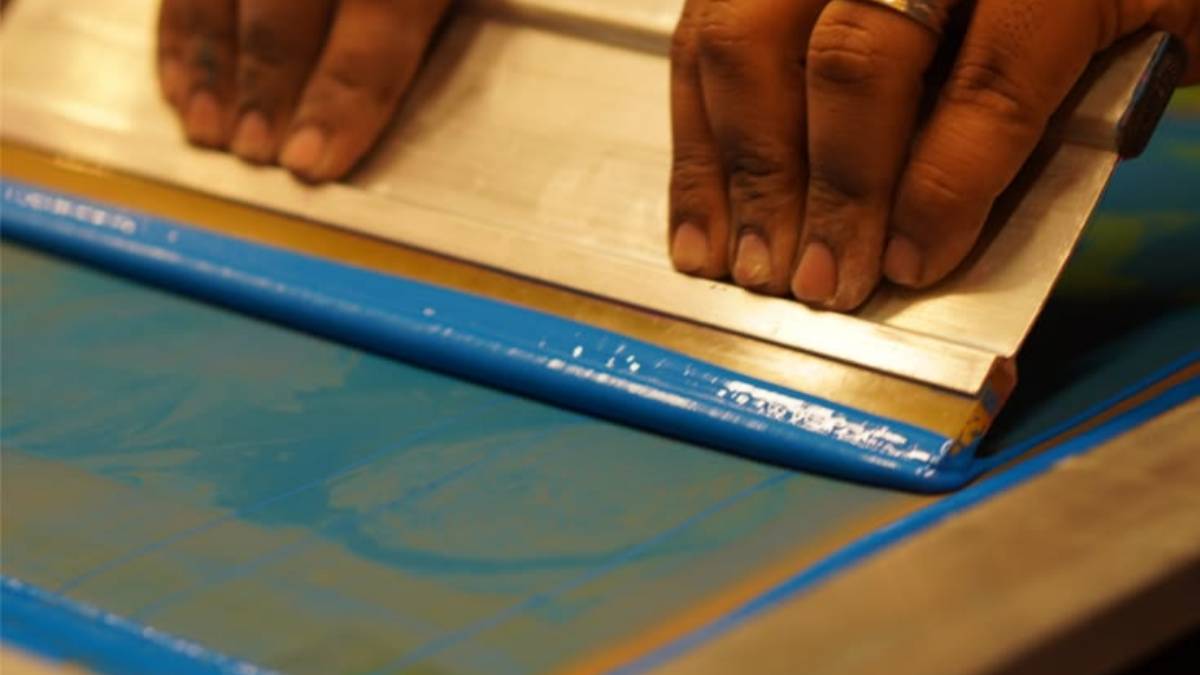
How to Improve Silicone Ink Adhesion on Silicone Rubber
At Sollyd, we solve this by combining high-purity cleaning, flame treatment, and precise temperature control. This strategy ensures your silicone ink stays permanently bonded, even through extreme stretching and industrial washing.

Table of Contents
How to Improve Silicone Ink Adhesion on Silicone Rubber
Half the guys on here think because they know plastisol, they can just magically print on silicone. Newsflash: Silicone rubber hates you. It has surface energy so low your ink just beads up like water on a waxed hood. Peeling prints. Massive rejection rates. You’re used to baking that vinyl paste to 320°F so it fuses into a solid chunk of rubber. Silicone doesn’t play by those rules.
If you want to actually lock this stuff down, you need a legit system like Sollyd Silicone Ink and a process that doesn’t suck. Surface treatment helps, but it won’t save you if your rubber is bleeding release agents or your curing is garbage.
Why Is Silicone Rubber Difficult to Print On?
Wetting and adhesion are completely different animals. Just because your ink spreads out doesn’t mean it’s bonded. Mold-release residues, processing oils, shop dust—it all sits on top of the substrate. Print over that, and you’re bonding to the trash, not the rubber. You stretch it, and it flakes off like dead sunburn skin in the customer’s wash.
How Silicone Ink Bonds to Silicone Rubber
Don’t assume textile silicone inks work on molded rubber. They don’t. You need addition-cure systems built for the exact substrate. And if you’ve got sulfur or tin-cure silicones floating around your shop? They will kill your platinum-cure catalyst dead. The ink stays a gooey mess. Establish adhesion through ripping at it, not just staring at it.
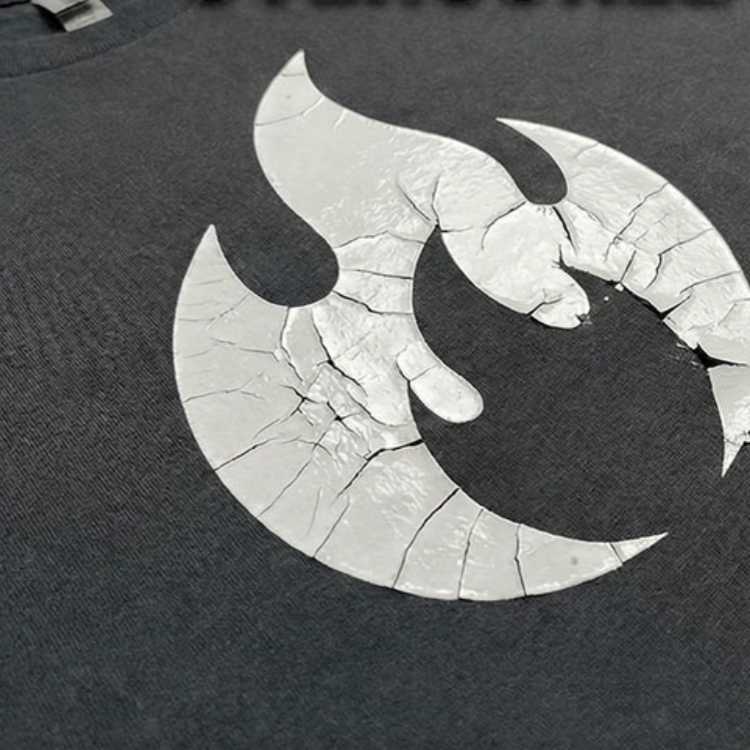
Main Factors Affecting Silicone Ink Adhesion
| Factor | The Reality | What to choke down and control |
| Substrate formulation | Condensation-cure rubber fights addition-cure inks. | Exact rubber grade, curing system, and batch lot. |
| Surface cleanliness | You print on oil, you peel on oil. | Degreasing procedure. Keep your greasy fingers off it. |
| Surface treatment | Flame/plasma burns the trash and activates the surface. | Burner distance, exposure time, speed. |
| Primer compatibility | It’s a chemical bridge, not a substitute for cleaning. | Approved product only. Follow the exact flash times. |
| Ink preparation | Eyeballing catalyst ruins the batch. | Component ratio, digital scale mixing, pot life. |
| Curing | Laser temp guns are liars—donut probes tell the truth. | Actual thermal profile inside the tunnel dryer. |
| Aging | Looks great today, peels off next Friday. | Post-cure migration and stress testing. |
How Silicone Rubber Type Affects Adhesion
LSR and HCR. Liquid silicone rubber vs high-consistency rubber. Doesn’t matter what the acronym is if you don’t know what fillers and additives the manufacturer dumped into the batch. Condensation-cure rubber will fight addition-cure inks. Run a trial. Stop guessing. Mobile ingredients and internal lubricants will migrate to the surface over time. A freshly cleaned sample behaves totally differently after sitting on a rack for a week.
Surface Contamination: Mold Release Agents, Silicone Oil and Dust
External mold-release agents. Processing oils. Handling residues. Dust. Do not assume your molded parts are clean straight from the factory. Ask how they were made. Compare a raw sample against a scrubbed sample.
Cleaning Silicone Rubber Before Printing
IPA isn’t a magic wand. It won’t strip heavy silicone oils. You need a real cleaner. Take a clean, low-lint rag. Wipe it. Throw the rag in an OSHA-rated fire can. Don’t use the same dirty rag for the whole batch—you’re just smearing the release agent everywhere. Let it dry totally. If you print on wet solvent, it blows out. Plastisol never dries on the mesh—leave it over the weekend, eat lunch, it doesn’t care. But don’t touch it with water. You need press wash, mineral spirits, or degreaser.
Silicone Surface Treatment Before Printing
Corona, plasma, and flame treatment. This isn’t just waving a blowtorch around. Flame treatment burns off the crap and activates the surface, but if you do it next to a puddle of residual cleaning solvent, you’re going to blow up your shop.
| Method | Where you use it | What actually matters |
| Corona | Flat, accessible surfaces. | Treatment gap, power, speed. |
| Plasma | Localized spots. | Gas mix, distance, exposure time. |
| Flame | Heavy-duty thermal treatment. | Burner settings, speed. Don’t melt the part. |
Treat it, then print it. Activated surfaces die over time. Storage kills activation. The clock is ticking the second you flame it. Dyne pens lie. They get contaminated by the texture of the rubber. Establish your own baseline by printing, curing, and trying to rip it off.
When Is a Silicone Ink Primer Required?
Sometimes the rubber is stubborn. You need primer. Don’t slop it on thick. Follow the actual drying times. Compare identical samples with and without primer. Evaluate the whole stack after you bake it.
How Catalyst Ratio and Mixing Affect Adhesion
Mix the exact ratio on a digital scale. Eyeballing it is for amateurs. The base is stiff as cold peanut butter right out of the bucket; you have to churn it with a spat until your forearms ache. Dump reducer in it to make it soft, and watch your opacity turn into a dirty gray ghost. And don’t just dump extra catalyst in because the print is tacky. That’s not how chemistry works. Stay within your pot life.
How Curing Temperature and Time Affect Adhesion
I see guys trusting the dial on their tunnel dryer. 230°F flash is just tacky surface gel so the next head doesn’t smear. If the core of that deposit doesn’t see a verified 320°F (160°C) through the tunnel, it fails. Your oven setting doesn’t mean crap if the silicone part is thick and sucks up all the heat. Laser temp guns are liars—donut probes tell the truth.
Under-Curing and Excessive Heat Exposure
Under-cure it, and it splits. Over-bake it, and you fry the substrate. You want bright white on black cotton? You’re smashing it through an 86 or 110 mesh with heavy squeegee pressure. You end up with bulletproof chest armor that feels like a floor mat. Silicone requires the same reality check—thick deposits need serious, verified heat penetration.
Cure Inhibition and Material Compatibility
Tacky at the bottom, cured on top? That’s inhibition. Your substrate poisoned the ink. Platinum-cure silicones are sensitive. Touch it with a latex glove, cross-contaminate it with sulfur, and it stays wet forever. Test the ink on a known good surface. If the control cures but the production piece stays tacky, your rubber is the problem.
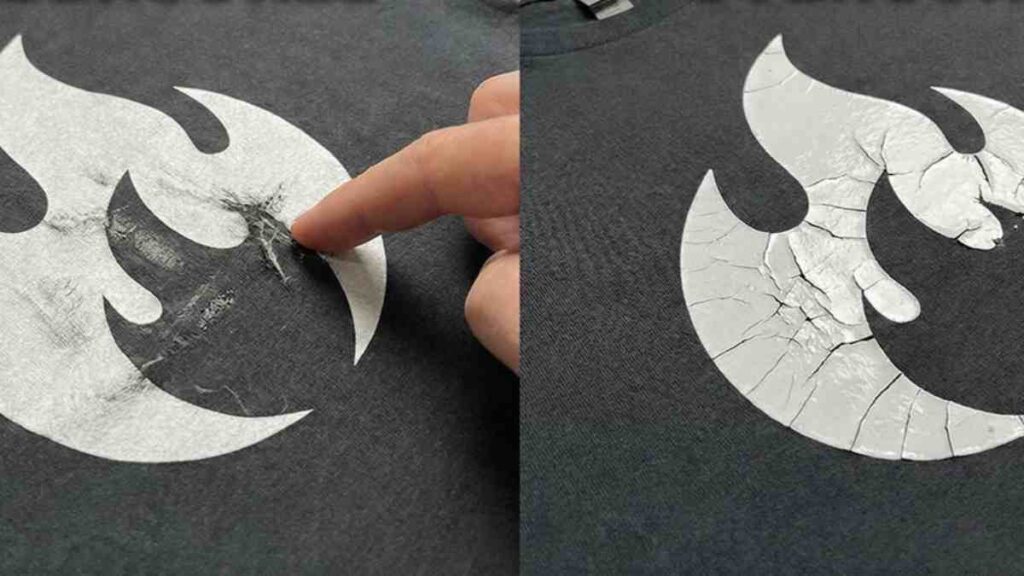
Why Does Silicone Ink Peel After Curing?
Look at the failure before you start twisting dials.
- Peels cleanly off the rubber: Contamination. Bad treatment. Crappy primer.
- Layers split apart: Interlayer contamination or you flashed it too hot/long between colors.
- Ink tears itself apart: You laid it down too thin or your cure is totally botched.
Why Can Adhesion Fail After Aging?
Looks great today, peels off a week later. Mobile ingredients in the rubber migrate to the surface and break the chemical bond. Moisture, repeated stretching, or an unstable primer will do it too. Expose it to the real world. You get your bright white print turning pepto-bismol pink on red poly because the heat pulled the shirt dye right up into the plastic. Silicone has its own version of migration failure. Test it cold, test it hot, test it washed.
Silicone Ink Adhesion Testing
A fingernail scratch isn’t a reproducible test, you hacks.
| Test | What it actually tells you | How to ruin it |
| Tape test | Cross-hatch adhesion strength. | Using weak tape or not rubbing it down hard. |
| Stretch test | Does it crack when pulled? | Pulling it past the substrate’s actual limit. |
| Rub test | Surface durability against abrasion. | Not tracking the weight or cycle count. |
| Wash test | Surviving the washing machine. | Running a 15-minute quick wash instead of heavy duty. |
| Aging test | Does it fail next month? | Skipping the heat/humidity chamber. |
Silicone Ink Adhesion Troubleshooting Table
| Problem | The brutal reality | How to fix it |
| Ink beads up | Surface energy is too low or covered in oil. | Clean, flame treat, check compatibility. |
| Stays tacky everywhere | You screwed up the catalyst ratio or oven temp. | Weigh your mix. Probe your dryer. |
| Tacky only at the bottom | Cure inhibition from the rubber. | Isolate from sulfur/latex. Run control tests. |
| Peels clean off | Weak interface. Trash on the substrate. | Fix your degreasing and priming workflow. |
| Cracks when stretched | Film is too thin or heavily under-cured. | Check deposit thickness. Bake it harder. |
| Splits between colors | Over-flashed the base. | Drop the flash time. 230°F is just a gel. |
Adhesion Validation Before Mass Production
Write down every single variable. Rubber batch, release agents used, primer flash times, exact catalyst ratios, and the actual probed curing profile. Do a full run before you commit to 5,000 pieces. If the factory changes the rubber formula next month, your old notes are garbage. Start over.
FAQ
Is Sollyd silicone ink safe for eco-conscious brands?
Yes. We prioritize environmental safety. Our inks are PVC-free and phthalate-free. We meet REACH and OEKO-TEX standards, which is a huge requirement for our big clients exporting to the EU and USA.
How does humidity affect the printing process?
Silicone is sensitive. High humidity can slow down the catalyst reaction. I always suggest keeping your production room at 45-55% humidity to keep your batch consistency high.
Can we get a custom formulation for our specific substrate?
We do this all the time. If you send us a sample of your rubber, our lab can adjust the ink’s resin or catalyst package to ensure you get a 100% bond during sample validation.
What is the “pot life” of the mixed ink?
Usually, you have about 4 to 6 hours. If your factory is hot, it might be less. I recommend mixing only what you need for a 4-hour shift to prevent wasting expensive material.
Does the color of the ink affect how it sticks?
Sometimes. Darker pigments like carbon black absorb more heat. You might find that black ink cures faster than white ink. Always adjust your belt speed based on the darkest color in your design.

 English
 Deutsch (Sie)
 العربية
 বাংলা
 香港中文
 Français
 Bahasa Indonesia
 Português do Brasil
 한국어
 Tiếng Việt
 日本語
 Polski
 Русский
 Türkçe
 ไทย
 Español de México